Load testing a Docker application with JMeter and Amazon EC2
Published
A couple of months ago I blogged about JMeter load testing from a continuous integration build and gave a few tips and tricks on how to get the most out of automated load tests. In this blog post I would like to go a bit more hands on and show how to manually load test a Docker application with JMeter and the help of Amazon Web Services.
I will be launching two Amazon EC2 instances to conduct a single load test. One instance will host a Docker application and the other the JMeter load test tool. The benefit of this setup is that Docker and JMeter have their own dedicated resources and I can load test the application in isolation. It also allows me to quickly tear down the Docker instance and vertically scale it up or down to measure the impact of it.
Launching a Docker VM
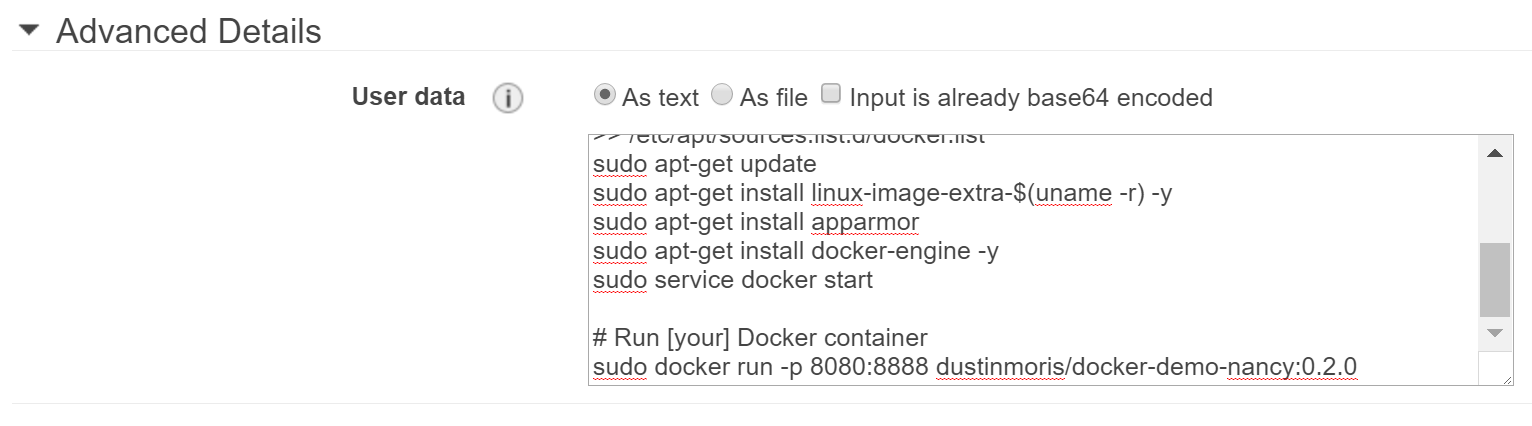
First I will create a new EC2 instance to host the Docker container. The easiest way of doing this is to go through the online wizard and select the Ubuntu 14.04 base image and paste the following bash script into the user data field to automatically pre-install the Docker service during the launch up:
#!/bin/bash

# Install Docker
sudo apt-get update
sudo apt-get install apt-transport-https ca-certificates
sudo apt-key adv --keyserver hkp://p80.pool.sks-keyservers.net:80 --recv-keys 58118E89F3A912897C070ADBF76221572C52609D
sudo bash -c 'echo "deb https://apt.dockerproject.org/repo ubuntu-trusty main" >> /etc/apt/sources.list.d/docker.list'
sudo apt-get update
sudo apt-get install linux-image-extra-$(uname -r) -y
sudo apt-get install apparmor
sudo apt-get install docker-engine -y
sudo service docker start

# Run [your] Docker container
sudo docker run -p 8080:8888 dustinmoris/docker-demo-nancy:0.2.0
At the end of the script I added a docker run command to auto start the container which runs my application under test. Replace this with your own container when launching the instance.
Simply click through the rest of the wizard and a few minutes later you should be having a running Ubuntu VM with Docker and your application container running inside it.
Make sure to map a port from the container to the host and open this port for inbound traffic. For example if I launched my container with the flag -p 8080:8888 then I need to add the port 8080 to the inbound rules of the security group which is associated with this VM.
Launching a JMeter VM
Next I am going to create a JMeter instance by going through the wizard for a second time. Just as before I am using Ubuntu 14.04 as the base image and the user data field to install everything I need during the launch-up:
#!/bin/bash

# Install Java 7
sudo apt-get install openjdk-7-jre-headless -y

# Install JMeter
wget -c http://ftp.ps.pl/pub/apache//jmeter/binaries/apache-jmeter-3.0.tgz -O jmeter.tgz
tar -xf jmeter.tgz
Don't forget to open the default SSH port 22 in the security group of the JMeter instance.
Only a short time later I have two successfully created VMs with Docker and JMeter being fully operational and ready to run some load tests.
Running JMeter tests
Running load tests from the JMeter instance is fairly straight forward now. I am going to remote connect to the JMeter instance, copy a JMeter test file on the machine and then launch the JMeter command line tool to run the load tests remotely. Afterwards I will download the JMeter results file and analyse the test data in my local JMeter GUI.
Download PuTTY SSH client tools
From here on I will describe the steps required to remote connect from a Windows desktop, which might be slightly different than what you'd have to do to connect from a Unix based system. However, most things are very similar and and it should not be too difficult to follow the steps from a Mac or Linux as well.
In order to SSH from Windows to a Linux VM you will have to download the PuTTY SSH client. Whilst you are on the download page you might also download the PSCP and PuTTYgen tools. One will be needed to securely transfer files between your Windows machine and the Linux VM and the other to convert the SSH key from the .pem to the .ppk file format.
Convert SSH key from .pem to .ppk
Before we can use PuTTY to connect to the Ubuntu VM we have to convert the SSH key which has been associated with the VM from the .pem to the .ppk file format:
- Open
puttygen.exe - Click on the "Load" button and locate the
.pemSSH key file - Select the SSH-2 RSA option
- Click on "Save private key" and save the key as a
.ppkfile
Once completed you can use the new key file with the PuTTY SSH client to remote connect to the EC2 instance.
Remote connect to the EC2 instance
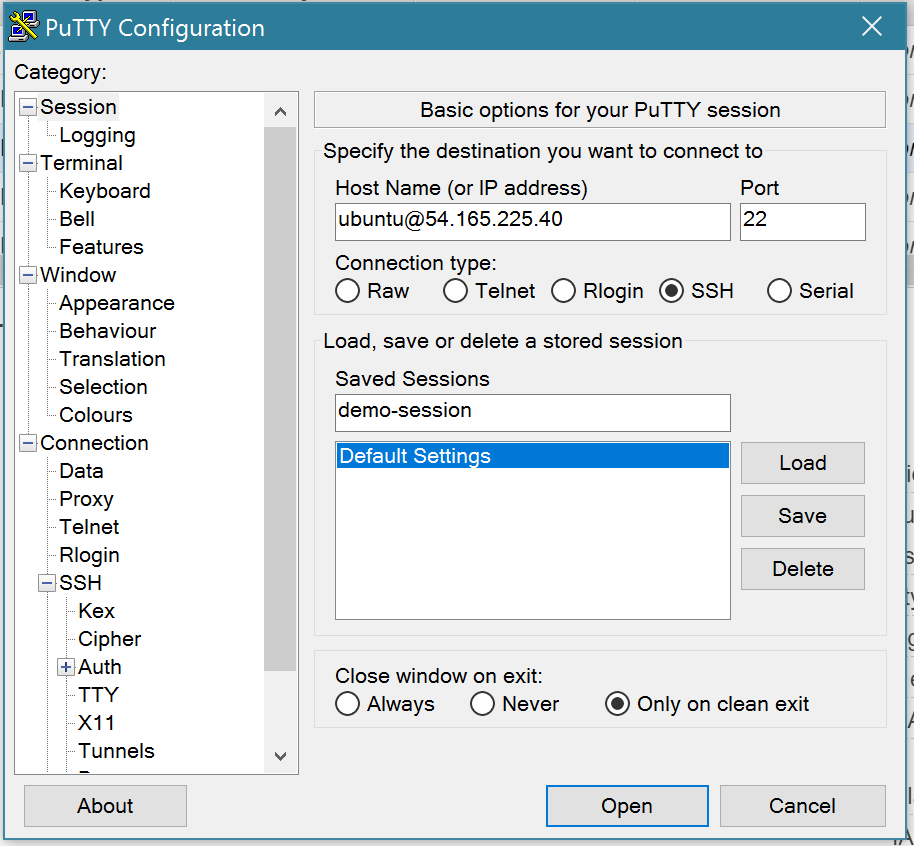
- Open
putty.exe - Type the public IP of the EC2 instance into the host name field
- Prepend
ubuntu@to the IP address in the host name field
(this is not necessarily required, but speeds up the login process later on) - On the left hand side in the tree view expand the "SSH" node and then select "Auth"
- Browse for the
.ppkprivate key file - Go back to "Session" in the tree view
- Type in a memorable name into the "Saved Sessions" field and click "Save"
- Finally click on the "Open" button and connect to the VM
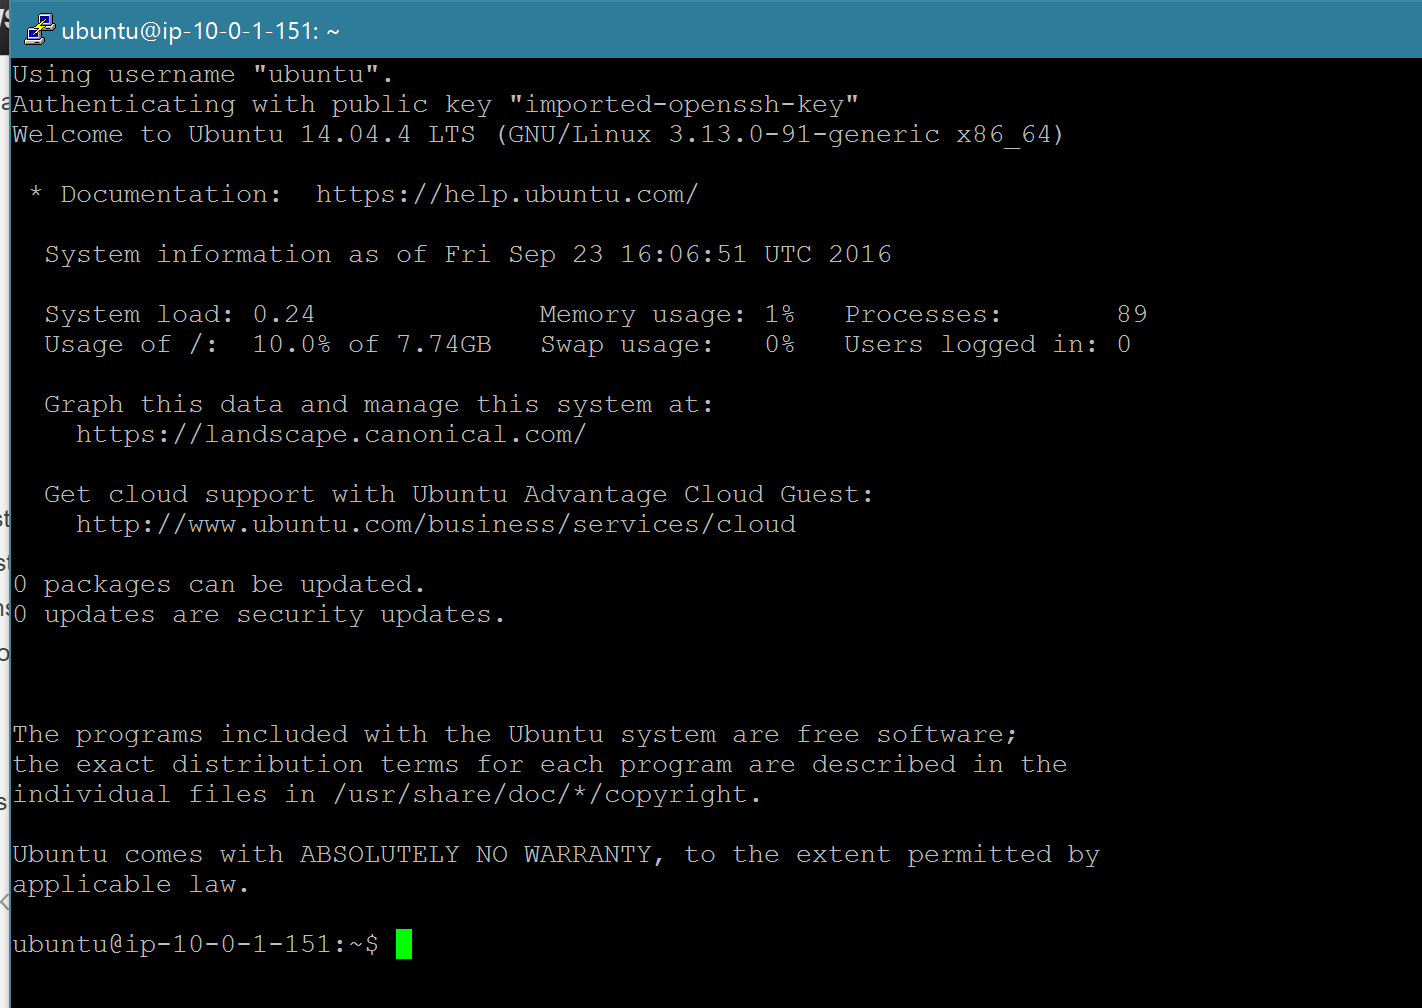
At this point you should be presented with a terminal window and being connected to the JMeter EC2 instance.
Upload a JMeter test file to the VM
Now you can use the pscp.exe tool from a normal Windows command prompt to copy files between your local Windows machine and the Ubuntu EC2 instance in the cloud.
The first argument specifies the source location and the second argument the destination path. You can target remote paths by prepending the username and the saved session name to it.
For example I downloaded the pscp.exe into C:\temp\PuTTY and have an existing JMeter test plan saved under C:\temp\TestPlan.jmx which I would like to upload to the JMeter instance. I named the session in PuTTY demo-session and therefore can run the following command from the Windows command prompt:
C:\temp\PuTTY\pscp.exe C:\temp\TestPlan.jmx ubuntu@demo-session:TestPlan.jmxUsually the upload is extremely fast. If you don't know how to create a JMeter test plan then you can follow the official documentation on building a basic JMeter web test plan.
Running JMeter from the command line
After uploading the .jmx file we can switch back to the PuTTY terminal and run the test plan from the JMeter command line.
If you followed all the steps from before then you can find JMeter under /apache-jmeter-3.0/bin/./jmeter on the EC2 instance. Use the -n flag to run it in non-GUI mode, the -t parameter to specify the location of the test plan and -l to set the path of the results file:
apache-jmeter-3.0/bin/./jmeter -n -t TestPlan.jmx -l results.jtlRun this command, wait and watch the test being executed until it's completed.
Download the JMeter results file
Finally when the test has finished you can download the results file via the PSCP tool again:
C:\temp\PuTTY\pscp.exe ubuntu@demo-session:results.jtl C:\temp\From here on everything should be familiar and you can retrospectively open the results.jtl from an available JMeter listener and analyse the data in the JMeter GUI.
With the help of a cloud provider like Amazon Web Services and Docker containers it is super easy to quickly spin up multiple instances and run many load tests at the same time without them interfering with each other. You can test different application versions or instance setups simultanuly and optimise for the best performance.