Watch US Netflix, Hulu and more from anywhere in the world
Published
If you are reading this then I assume you are one of those unfortunate Netlix, Hulu and Co. users who does not live in the US and is upset that you are treated like a second class citizen by those companies? Well, you're damn right to be upset because you know you're paying the same amount of money as other users but getting a lot less for it which is just not fair. You are being discriminated because you don't live in the United States of America and the money in your pocket does not hold a picture of George Washington. It's a bloody pain and if you ask me it's an absolute disgrace that we still live in a time where we have to deal with those types of problems.
I don't even blame Netflix & Co. because these guys already get our money and they would be more than happy for us to watch whatever we want. It's some outdated laws and regulations made up by some poor souls in the content industry who force us into this miserable situation. Now the problem is that the internet is a global place and certainly does not know any borders. It has been the biggest motor of new economic growth for the last couple of decades and made the world a much smaller place than it used to be. If the internet has taught us one thing then it is that anyone can have anything, anywhere in the world with an instant effect and anyone who wants to convince us of the opposite is a dinosaur on the losing track. Patience and borders is a forgein concept which does not exist in the vocabulary of new generations, and that is for a good reason. They are impediments to innovation, growth and evolution.
Obviously the case is not as simple and clear cut as I make it sound, but it doesn't change the fact that there is a lot of stuff going awfully wrong at the moment and I feel like there is a lot of effort being made into the wrong direction. Instead of embracing the internet's full potential of global reach, companies are investing money and technology into setting up virtual borders and building detection software for people who violate those. While everyone else is making great steps forward, the media industry is desperately trying to stay resistent and not adapting to the new economy at all.
Playing cat and mouse with VPNs and Proxies
You probably know that one popular way of circumventing content restrictions is by streaming media via a VPN or proxy server. Every device which is connected to the internet has a so called IP Address. This address allows content providers to establish your geographic location and serve you a tailored view for your country. By using a proxy server you can pretend to be in a different location and trick a provider into serving you a much better offering than you would usually get. The concept is simple. Instead of streaming directly from Netflix & Co. you connect to an intermediate server, which is geographically located in the country of your desire and let that server stream the content for you on your behalf and forward it back to you. Sounds good in theory, except that Netflix and Co. have ways of detecting this spiel and will block you if not even cancel your account.
How does Netflix detect VPNs and Proxies?
The fact that they can do this is quite clever, because it is certainly not an easy thing to do. I don't know how they exactly do it, but there is some basic theory which might give us an idea how they detect whether you are using a VPN or not. First of all they are probably collecting a growing list of IP addresses which they know belong to popular VPN and proxy services. Those IP addresses get simply blacklisted and blocked. Another way of detecting proxy services would be by monitoring the amount of users connecting from the same IP address over a period of time. If you've got hundreds or thousands of users streaming from the same IP address then chances are high that this is a proxy server. Of course it could be a bunch of people streaming from a Starbucks, but even a Starbucks has to close its doors at some point in the day. A genuine user is probably going to work sometimes or at least has to sleep. If you detect streaming behaviour from an IP address which doesn't fit with normal human behaviour than it might be another indicator for dodgy activity. Now I am not saying that this is what Netflix does, and I am sure their detection system is much more sophisticated than this, but I want to share some ideas which demonstrate that detecting a VPN or proxy server is not always an impossible task.
So what can one do to trick those detection systems? Well, you'd have to stop sharing proxy servers for a beginning and make an IP look as normal as possible. Luckily setting up a private proxy server is really not that difficult and can be super cheap as well. As a matter of fact you can set up your own private proxy server entirely for free and I am going to show you how!
Amazon web services, Netflix's best friend (and ours)
Alright so you know Amazon right? It's the book shop which doesn't sell only books anymore. If you are a regular reader of my blog then you might know what I am going to say now, but if you are a non techie who came across this blog post through some other channel then you might be surprised to learn that Amazon was the pioneer of cloud providers. They are not only the largest, but also the most mature cloud operator in the world at the moment. Amazon is doing such a great job that Netflix runs its entire infrastructure in the cloud provided by Amazon.
The reason why I am telling you this is because Amazon's cloud has been so successsful that they are going mainstream by making cloud services easily available to anyone, people like you and me. If Netflix can deliver the latest season of House of Cards to the entire world with the help of Amazon web services, then surely we can host one tiny proxy server in the same cloud as well and circumvent their detection software, right? Yes, we can.
Setting up a proxy server with AWS EC2 in less than 10 minutes
Let's start off with some good news first. Amazon offers a 12 months free tier for new subscribers to their web services. This is an amazing offer and exactly what we are going to use to set up our private proxy. If you ask yourself what happens after those 12 months then wait until the end of this blog post.
Step 1: Sign up with Amazon web services
First you need to sign up with Amazon web services. If you already have an account then you can skip this step, otherwise follow the instructions:
- Go to the registration page and log in with your regular Amazon account
- After the login select the personal account option and fill in your address details
- On the next page fill in your payment information. This is required for the case when you exceed the free tier limitation, but don't worry about this, because it will not happen if you stick to my instructions
- The next step is pretty cool. You will be displayed a 4 digit PIN code on the screen and receive an automated phone call from Amazon. You will be asked to enter the PIN on your phone and if you typed it in correctly then the call will end immediately and you will be directed to the next step in the registration process
- From the list of support plans pick the basic (free) plan and click continue
- Now you are done and you should see a message that your account will be activated within a few minutes and usually you'll get an email notification as well
Step 2: Create a private proxy with EC2
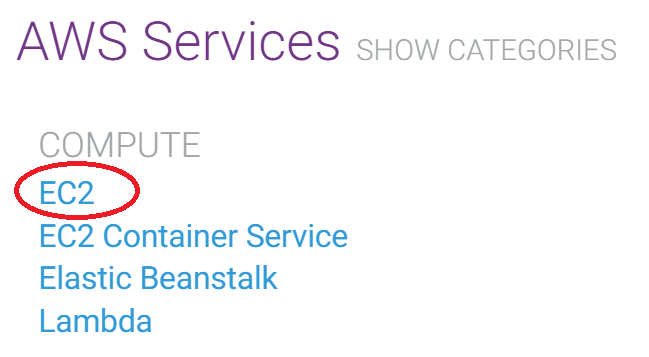
Once signed in you should see a list of available AWS Services. We are going to create a new EC2 instance which will become our private proxy server.
Click on the EC2 link from the menu:
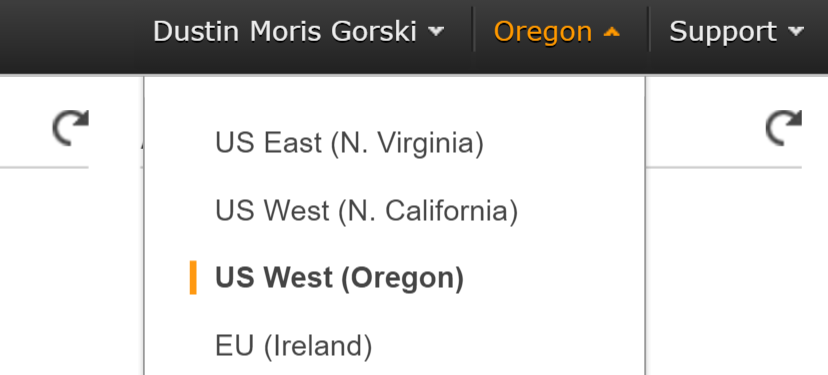
In the top right corner make sure you have selected a US region, because after all we want our proxy to stream US content:
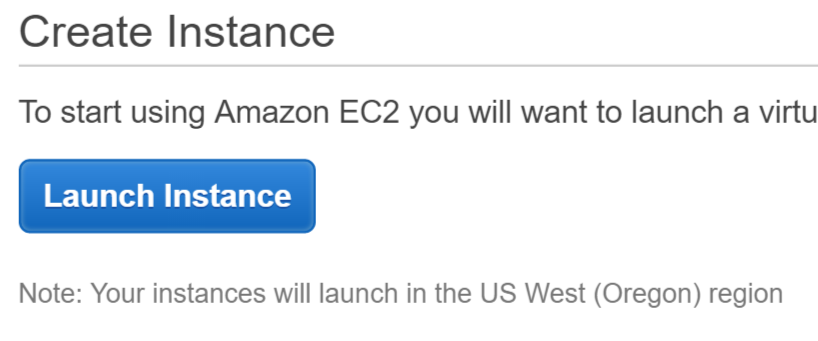
Next click on the Launch Instance button:
This opens up a 7-step wizard which will walk you through the configuration of a new EC2 instance. Don't worry, there is not much that needs to be done to get the proxy server up and running.
The first step lets you choose which image (AMI) to use for your new instance. An image is a snapshot of a pre-installed server. This allows you to create a new server which already has an operating system and other software installed so you don't have to do it manually each time.
For the purpose of the proxy server we don't need anything fancy and therefore can go with the Ubuntu Server, which is a free tier eligible Linux distribution:

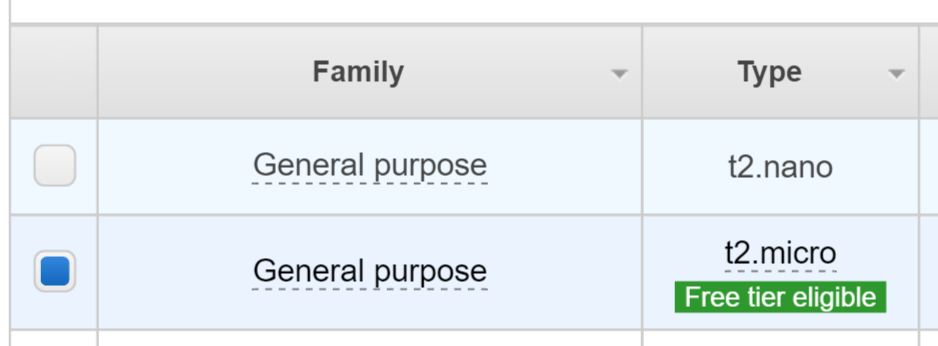
On the next screen you can pick the size of the new instance. If you don't know what this means, think of it like the horse power of your new server.
Again, because we don't need anything fancy we can happily go with the t2.micro instance which is free tier eligible:
Don't click on the Review and Launch button yet! Confirm and continue by clicking on the Next: Configure Instance Details button.
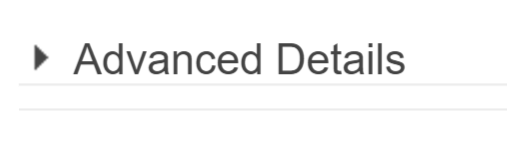
On the third step there's a bunch of information available, but luckily the default values are exactly what we need and you don't have to change any of them, except one thing. Scroll down to the bottom and expand the Advanced Details section by clicking on the little arrow next to it:
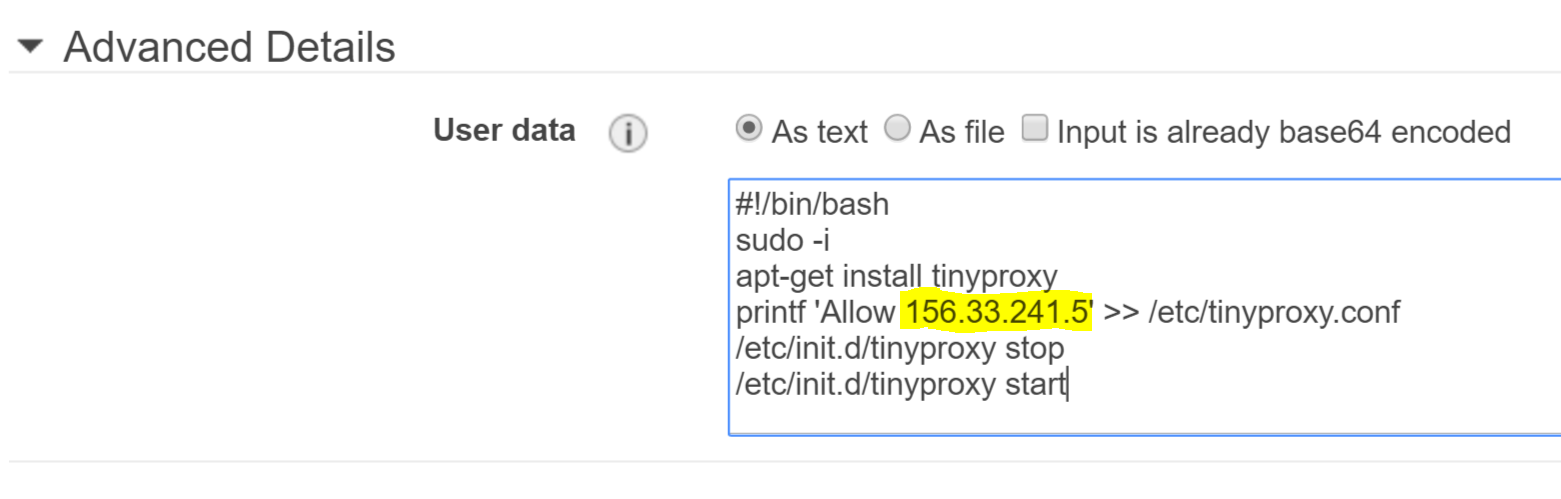
You will be presented with a text field which can be used to specify additional commands which will run when launching the new EC2 instance. We will add a few commands which will automatically install and configure the Tinyproxy software. Tinyproxy is a free and open source proxy server for POSIX operating systems.
Copy the following code snippet into the text field:
#!/bin/bash
sudo -i
apt-get install tinyproxy
printf 'Allow xxx.xxx.xxx.xxx' >> /etc/tinyproxy.conf
/etc/init.d/tinyproxy stop
/etc/init.d/tinyproxy start
Replace the xxx.xxx.xxx.xxx with your own IP address.
This is an important step, because by default Tinyproxy does not allow any connections other than from the host itself. Therefore we need to configure who is allowed to connect to the proxy server and because we want to keep it private you will enable your own IP address only. Make sense?
The end result should look something like this, except with your own IP address:
Continue by clicking on the Next: Add Storage button.
There is literally nothing to do here or in the next step. Click Next: Tag Instance and immediately move on to Next: Configure Security Group.
This is the last important step during the configuration. Here we configure which ports will be open on the new instance. If this is the first EC2 instance you are going to create then you are likely not going to have any existing security groups set up yet.
By default the wizard will create a new security group for you and add one rule for port 22. This is the default port to SSH into your EC2 instance. Normally as a system administrator you would want to keep this port open, but for the simplicity of this setup we can overwrite it. We don't really need to SSH into the instance and if you really want to you can always edit the security group afterwards.
In the drop down select Custom TCP Rule and enter port 8888 into the Port Range field. Why port 8888? Because this is the default port which Tinyproxy listens to. Under Source pick the Custom IP option and enter your IP address in the field next to it and append "/32" to the end:
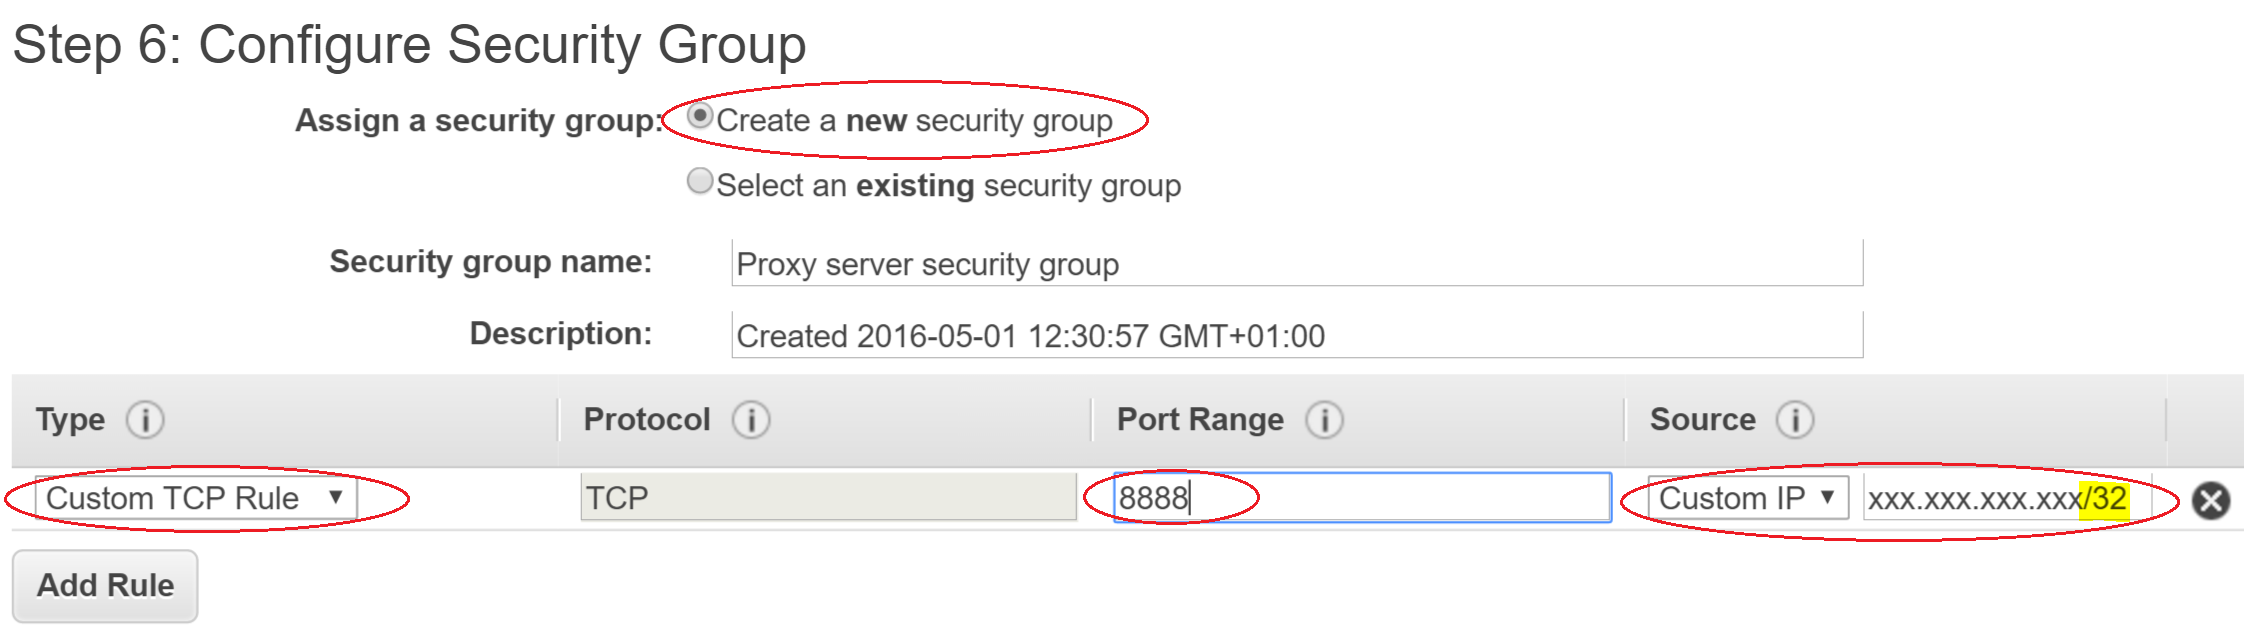
As you can see in the screen shot I also changed the security group name to something more meaningful. Feel free to pick your own name.
Click Review and Launch to get to the next screen and confirm there by clicking on Launch.
Almost done now! The final step is to create a private key pair. The private key pair is something you would need if you wanted to SSH into this instance, but as I said before, for the simple purpose of a proxy server you don't need to do this and therefore I will not go into any more detail. Just make sure you type in a meaningful name, something like "AWS Default Key Pair" or "AWS Proxy Server Key Pair" and hit the Download Key Pair button. Save this file somewhere in a secure place and keep it secret!
After that you should be able to click the Launch Instances button and let Amazon web services do the rest for you:
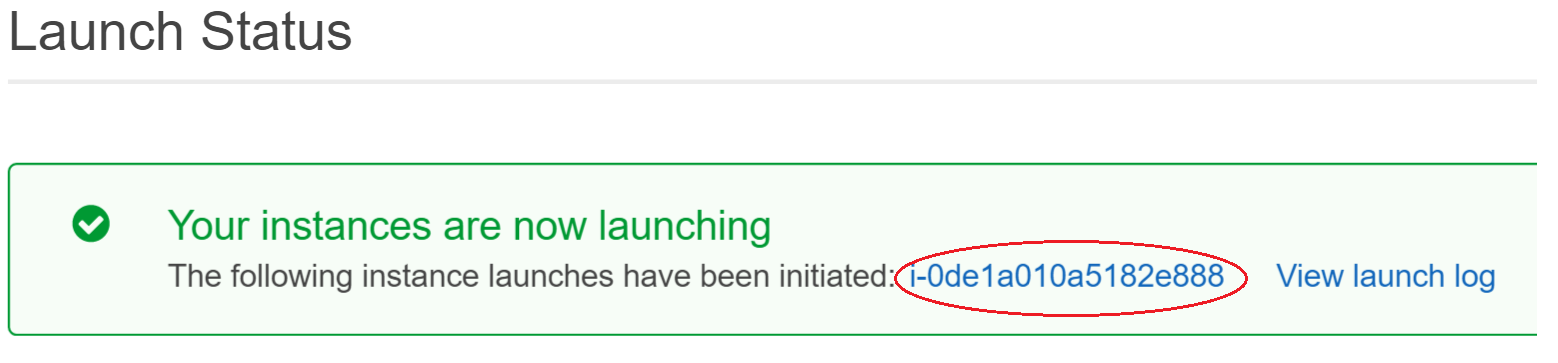
When you click on the instance id you get redirected back to the EC2 console where you can see your instance being initialized. It may take a few minutes until everthing is ready and once completed you should see the status to be "running" and all status checks to be OK:

The public IP address that you see with your instance is your new private proxy IP address! Take a note of it, because you will need it in the last step.
Step 3: Configure your device
The final step is to set up your device to connect via the proxy server. This is literally one single setting that you have to apply on your device. I have provided instructions for Windows, Android and iOS, but you can easily google for any other OS and find instructions online:
- Change proxy server settings in Windows
- Change proxy server settings in Android
- Change proxy server settings in iOS
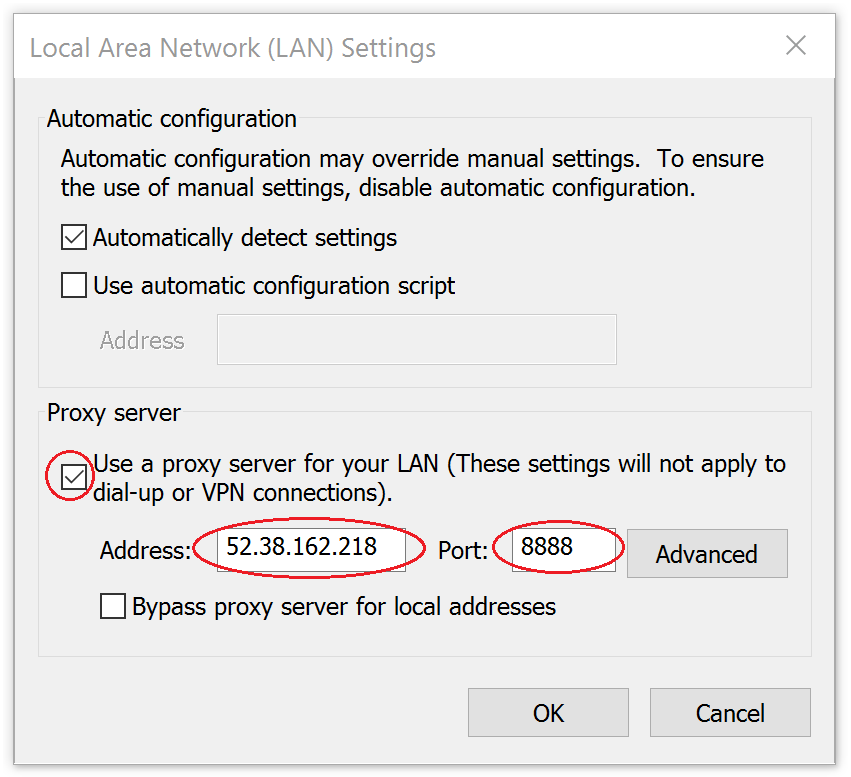
Changing proxy server settings in Windows
Follow these instructions even if you don't use Internet Explorer for browsing the internet. Proxy settings are a system wide setting and it doesn't matter through wich browser you open the dialog.
- Open Internet Explorer by clicking the Start button and type Internet Explorer into the search box and click on the corresponding result from the list
- Click the Tools button, and then click Internet Options
- Click the Connections tab, and then click LAN settings
- Select the Use a proxy server for your LAN check box
- Enter the IP address of your proxy server and port 8888 into the text fields
- Click OK and confirm everything
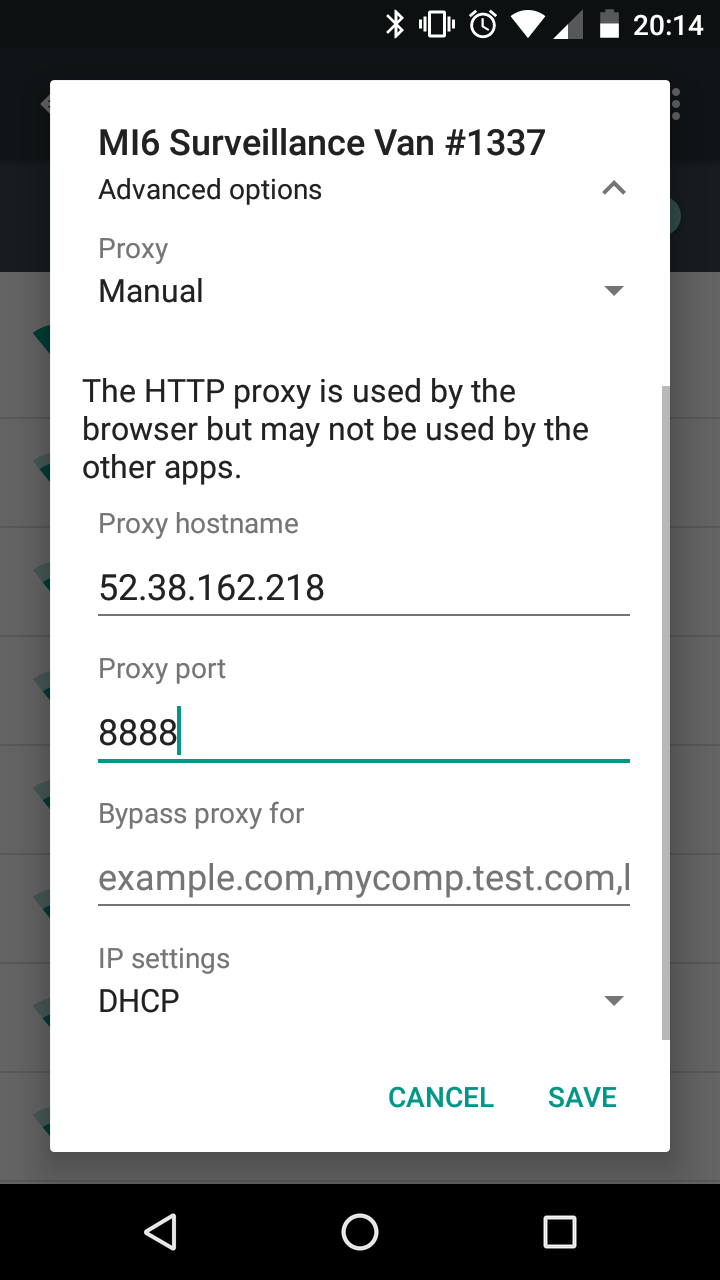
Change proxy server settings in Android
- Go into the Settings
- Click on the Wi-Fi menu item
- Long tap on the network which you are currently connected to
- Select the Modify network option
- Expand the Advanced options
- Selet the Manual option under Proxy
- Type in the IP address of your proxy server into the Proxy hostname field and port 8888 into Proxy port
- Save those settings
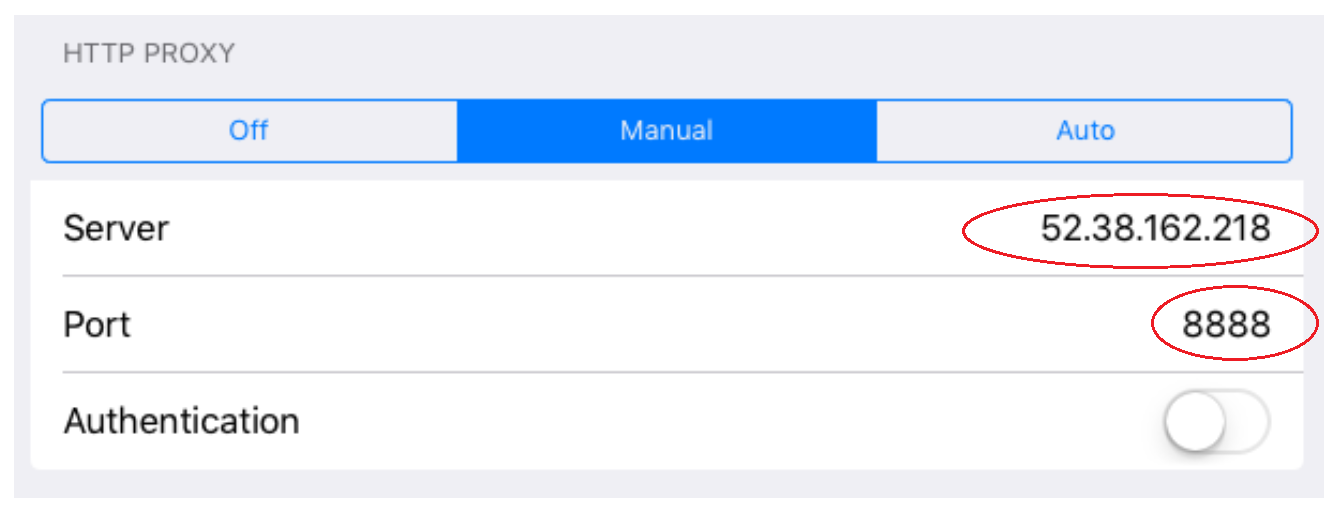
Change proxy server settings in iOS
- Go into the Settings
- Click on the Wi-Fi menu item
- Click on the network which you are currently connected to
- Select the Manual option under HTTP PROXY
- Type in the IP address of your proxy server into the Server field
- Type 8888 into the Port field
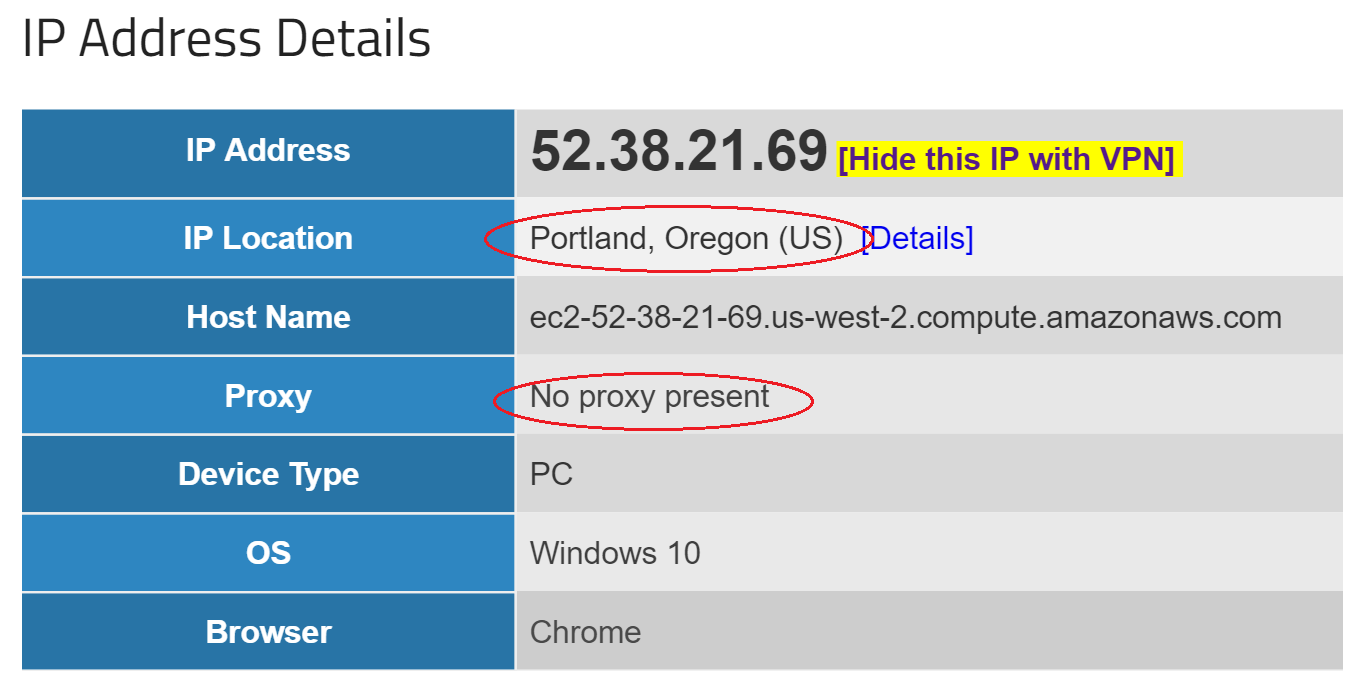
Test your connection
Now that everything is set up and running you should be able to stream US content from Netflix, Hulu and many more! A quick test to confirm that your proxy server is successfully running would be to google your own IP address and see that your IP appears different, from a US location now:
And what shall you do after your first 12 months of free tier eligibility? Well, I'd suggest you sign up a new account under a different email address. It takes only a couple of minutes which you have to invest every 12 months in order to run a free private proxy server. If that is too much effort then you might as well choose to let your server run and pay for its usage. The t2.micro instance costs only $0.013 per hour which would come down to $9.75 per month if you'd let it run continuously. However, in this case I'd suggest to switch it on and off as you need and reduce your cost to almost nothing.
Oh, and if you wonder about any of the IP addresses shown on the screenshots of this blog post then let me assure you that none of those servers exist anymore and you really have to go through the few minutes of setting up your own private proxy server ;)