Running NancyFx in a Docker container, a beginner's guide to build and run .NET applications in Docker
Published
The quiet Christmas period is always a good time to explore new technologies and recent trends which have been on my list for a while. This Christmas I spent some time learning the latest ASP.NET framework, in particular how to run ASP.NET 5 applications on Linux via the CoreCLR and how to run a regular .NET 4.x web application via Mono in a Docker container. The latter is what I am going to talk about in this blog post today.
What is Docker?
I assume you have some basic knowledge of what Docker is, how it revolutionized the way we ship software into the cloud and what the benefits are of a container over a VM. If anything of this doesn't make sense, then I would highly recommend to make yourself familiar with the basic concept of containers and why it is desirable to run applications in a container first.
A few good resources to get you started are:
- Docker Training
- Docker Docs
- Docker Deep Dive on Pluralsight
- Awesome Docker (list of useful Docker resources)
Setting up Docker on Windows
First I want to get Docker running locally so I can run and debug applications in a development environment. Luckily this has been made extremely easy for us. All I need is to download the Docker Toolbox for Windows and follow the instructions.
Docker Toolbox
After installation I will have three new applications:
- VirtualBox
- Kitematic
- Docker Quickstart Terminal
If you have VirtualBox already installed then the installer will skip over this step. The important thing to know is that VirtualBox has an external API which can be used by other applications to manage VMs automatically. This is exactly what the Docker Machine does. It will create a new VM in VirtualBox with an image which has everything you need to run Docker there. Because it is all automated you never really have to worry about VirtualBox yourself.
Kitematic is a GUI client around the Docker Machine. At the moment it is very limited in functionality and therefore you will not need it either.
This leaves the Docker Terminal as the last application and the only thing which we will be using to run and manage Docker containers in a local environment.
Run your first Docker command from the Terminal
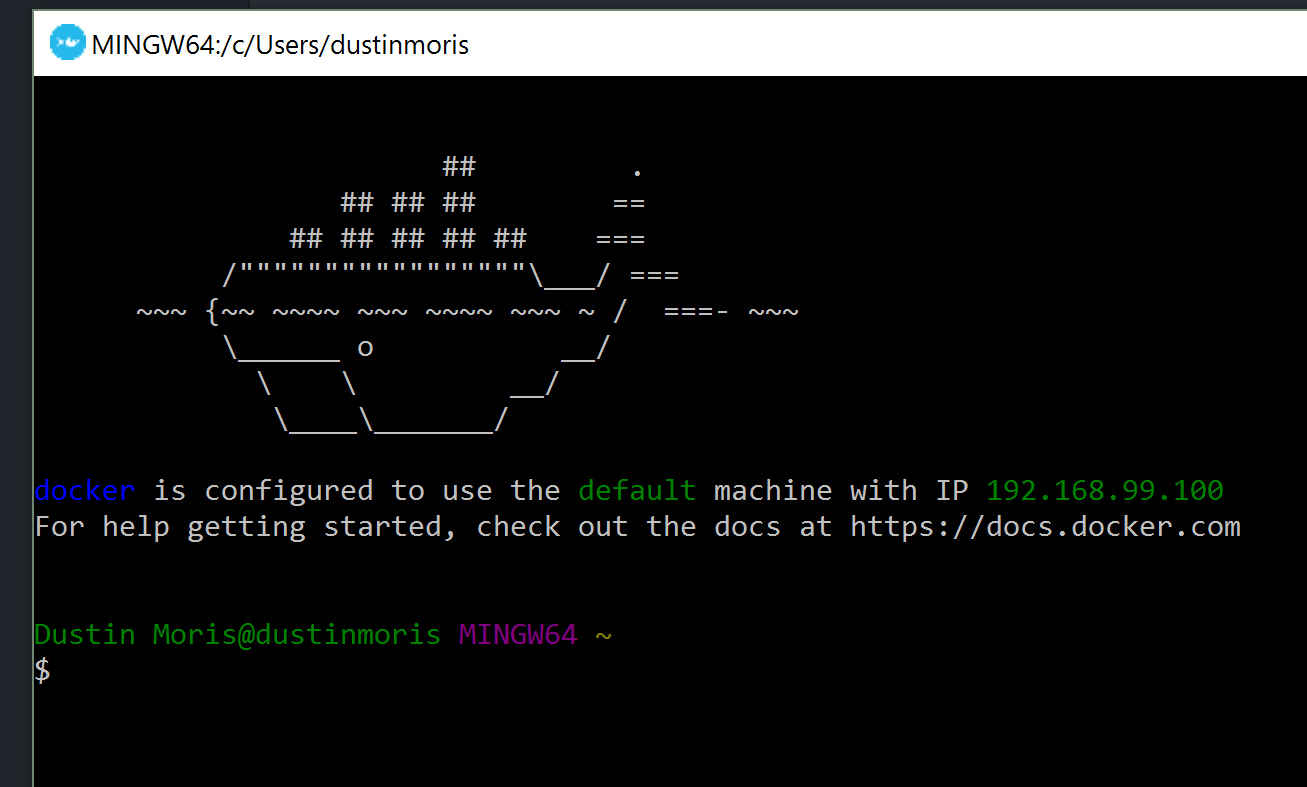
After a successful installation let's run a first Docker command to see if things generally work. When you open the terminal for the first time it will initialize the VM in VirtualBox. This may take a few seconds but eventually you should end up at a screen like this:
You don't have to open Kitematic or VirtualBox to get it running. As I said before, you can happily ignore those two applications, however, if you are curious you can look into VirtualBox and see the VM running as expected:


It's a Linux box loaded from the boot2docker.iso.
Back to the terminal I can now type docker version to get some basic version information about the Docker client and server application:

With that I am good to go with Docker now.
Maybe one thing which is worth mentioning at this point is the initial message in the Docker Terminal:

The IP address which is shown in the terminal is the endpoint from where you can reach your application later in this tutorial.
Creating a NancyFx web application for Docker
Now it is time to actually create a .NET web application which can run on Mono.
First I create a new project using the template for a regular console application, targeting .NET Framework 4.6.1.
The project is entirely empty except the Program.cs file:
class Program
{
    static void Main(string[] args)
    {
    }
}
Next I have to install 3 NuGet packages:
Install-Package Nancy
Install-Package Nancy.Hosting.Self
Install-Package Mono.Posix
The first package installs the NancyFx web framework. Nancy is a lightweight .NET framework for building HTTP based services. You can think of it like a counterpart of ASP.NET, except it has nothing to do with ASP.NET, IIS or the System.Web namespace.
You can still host Nancy applications on IIS, but you can equally host it somewhere else like a console application. This is exactly what we will do and why we install Nancy.Hosting.Self as the second package.
The third package installs the POSIX interface for Mono and .NET.
Having the Nancy packages installed I can now configure an endpoint and start a new Nancy.Hosting.Self.NancyHost:
using System;
using Nancy.Hosting.Self;

class Program
{
    static void Main(string[] args)
    {
        const string url = "http://localhost:8888";

        var uri = new Uri(url);
        var host = new NancyHost(uri);

        host.Start();
    }
}
This console application will exit immediately after launching and therefore I need to add something to keep it open such as a Console.ReadLine() command. Additionally I want to stop the host when I know the application is going to shut down:
host.Start();
Console.ReadLine();
host.Stop();
If I would want to run this on Windows then I would be done now, but on Linux I want to wait for Unix termination signals instead.
A way to detect if the application is running on Mono is with this little helper method:
private static bool IsRunningOnMono()
{
    return Type.GetType("Mono.Runtime") != null;
}
Another helper method exposes the Unix termination signals:
private static UnixSignal[] GetUnixTerminationSignals()
{
    return new[]
    {
        new UnixSignal(Signum.SIGINT),
        new UnixSignal(Signum.SIGTERM),
        new UnixSignal(Signum.SIGQUIT),
        new UnixSignal(Signum.SIGHUP)
    };
}
I add both methods to my Program class and change the Main method to support both, Windows and Unix termination:
host.Start();

if (IsRunningOnMono())
{
    var terminationSignals = GetUnixTerminationSignals();
    UnixSignal.WaitAny(terminationSignals);
}
else
{
    Console.ReadLine();
}

host.Stop();
This is what the final class looks like:
using System;
using Nancy.Hosting.Self;
using Mono.Unix;
using Mono.Unix.Native;

class Program
{
    static void Main(string[] args)
    {
        const string url = "http://localhost:8888";

        Console.WriteLine($"Starting Nancy on {url}...");

        var uri = new Uri(url);
        var host = new NancyHost(uri);
        host.Start();

        if (IsRunningOnMono())
        {
            var terminationSignals = GetUnixTerminationSignals();
            UnixSignal.WaitAny(terminationSignals);
        }
        else
        {
            Console.ReadLine();
        }

        host.Stop();
    }

    private static bool IsRunningOnMono()
    {
        return Type.GetType("Mono.Runtime") != null;
    }

    private static UnixSignal[] GetUnixTerminationSignals()
    {
        return new[]
        {
            new UnixSignal(Signum.SIGINT),
            new UnixSignal(Signum.SIGTERM),
            new UnixSignal(Signum.SIGQUIT),
            new UnixSignal(Signum.SIGHUP)
        };
    }
}
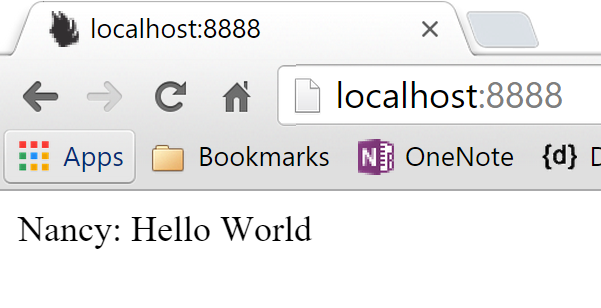
All I am missing now is at least one Nancy Module which serves HTTP requests. This is done by implementing a new module which derives from Nancy.NancyModule and registering at least one route. I setup a "Nancy: Hello World" message on the root / endpoint and an OS version string on the /os endpoint:
using System;
using Nancy;

public class IndexModule : NancyModule
{
    public IndexModule()
    {
        Get["/"] = _ => "Nancy: Hello World";
        Get["/os"] = _ => Environment.OSVersion.ToString();
    }
}
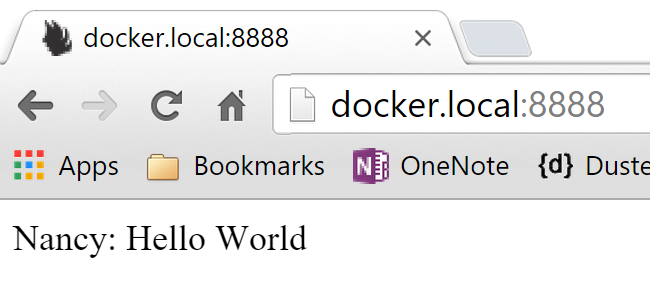
If I compile and run the application then I should be able to see the hello world message when visiting http://localhost:8888 and see the OS version at http://localhost:8888/os:

Running NancyFx in a Docker container
The application is very simple but certainly enough to deploy the first version in a Docker container.
Create a Dockerfile
First I need to build a Docker image which will contain the entire application and all of its dependencies. For this I have to create a recipe which defines what exactly goes into the image. The recipe is a Dockerfile, an ordinary human readable text file with instructions on how to compose an image. It is important to name the file exactly as shown, without a file extension and a capital "D".
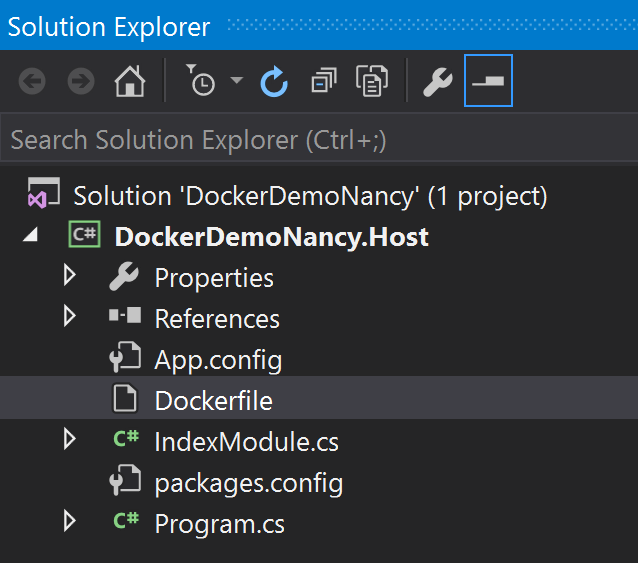
It is good practice to add the Dockerfile into your project folder, because it may change when your project changes:
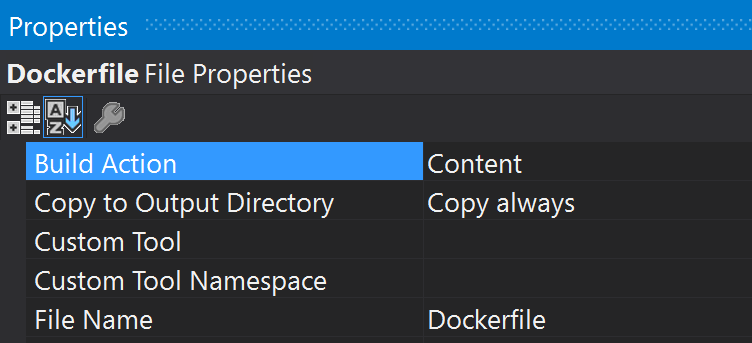
I also want to include the Dockerfile in the build output, therefore I have to change the "Build Action" setting to "Content" and "Copy to Output Directory" to "Copy always":
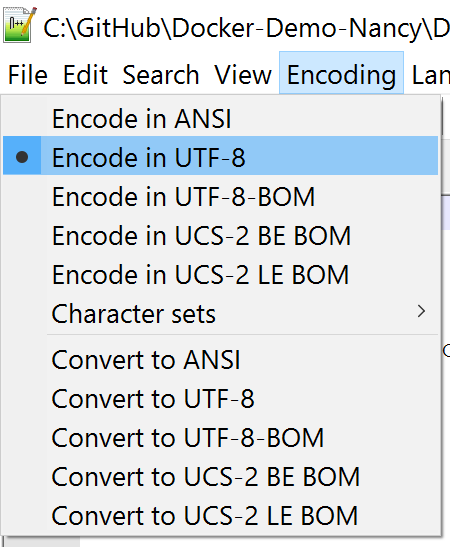
Visual Studio 2015 creates text files with UTF-8-BOM encoding by default. This adds an additional (invisible) BOM character at the very beginning of the text file and will cause an error when trying to build an image from the Dockerfile. The easiest way to change this is by opening the file in Notepad++ and changing the encoding to UTF-8 (without BOM):
You can also permanently change Visual Studio to save files without BOM.
Now that this is sorted I can open the file and start defining the build steps.
Every Dockerfile has to begin with the FROM instruction. This defines the base image to start with. Docker uses a layering system which is one of the reasons why Docker images are so light. You can find many official images to start with at the public Docker Hub.
Fortunately there is already an official Mono repository which we can use. The most recent image is 4.2.1.102 at the time of writing. As you can see the Mono image itself has the debian:wheezy image from the official Debian repository as its base. The Debian image has the empty scratch image as its base. When we use the Mono image we essentially build a new layer on top of an existing tree:
scratch
   \___ debian:wheezy
       \___ mono:4.2.1.102
           \___ {our repository}:{tag}
If you look at the official Mono repository you can see that the latest Mono image has multiple tags:

It depends on your use case which tag makes the most sense for your application. Currently they all have been built from the same Dockerfile, but only tag 4.2.1.102 is explicit enough to always guarantee the exact same build. Personally I would chose this one for a production application:
FROM mono:4.2.1.102The next two instructions are very straight forward. I want to create a new folder called /app and copy all relevant files, which are required to execute the application, into this folder. Remember that the Dockerfile gets copied into the build output folder. This means that I basically have to copy everything from the same directory where the Dockerfile sits into the /app folder:
RUN mkdir /app
COPY . /app
My Nancy application has been configured to listen to port 8888. With the EXPOSE instruction I inform Docker that the container listens to this specific port:
EXPOSE 8888
Finally I have to run the application with Mono:
CMD ["mono", "/app/DockerDemoNancy.Host.exe", "-d"]
This is what the final Dockerfile looks like:
FROM mono:4.2.1.102
RUN mkdir /app
COPY . /app
EXPOSE 8888
CMD ["mono", "/app/DockerDemoNancy.Host.exe", "-d"]
There is a lot more you can do with a Dockerfile. Check out the Dockerfile reference for a complete list of available instructions.
Build a Docker image
Building a Docker image is extremely easy. Back in the Docker Terminal I navigate to the /bin/Release/ folder of my Nancy application:
cd /c/github/docker-demo-nancy/dockerdemonancy.host/bin/release
Next I run the docker build command and tag the image with the -t option:
docker build -t docker-demo-nancy:0.1.0 .
Don't forget the dot at the end. This is the path to the directory which contains the Dockerfile. Because I already navigated into the /bin/Release/ folder I just put a dot at the end.
The build process will go through each instruction and create a new layer after executing it. The first time you build an image you are likely not going to have the mono:4.2.1.102 image on disk and Docker will pull it from the public registry (Docker Hub):
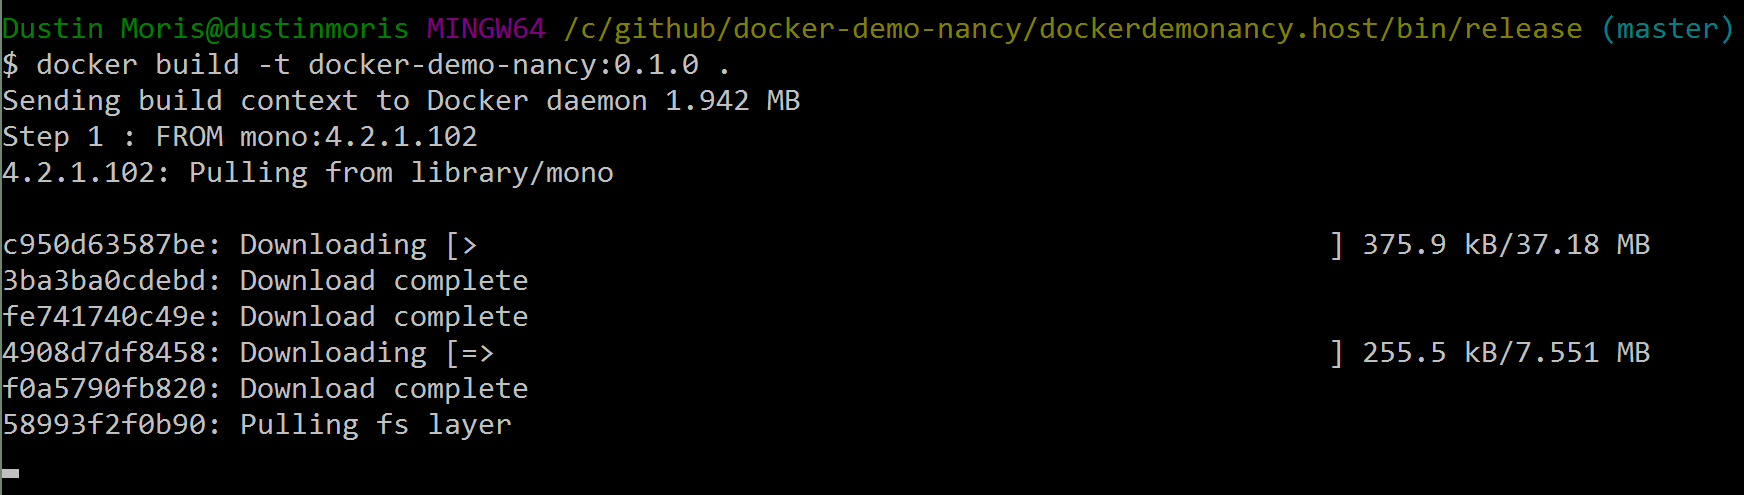
As you can see the FROM instruction requires Docker to download 6 different images. This is because the mono:4.2.1.102 image and all of its ancestors (debian:wheezy) have 6 instructions in total, which result in 6 layered images.
A better way of visualizing this is by inspecting our own image.
Once the build is complete we can list all available images with the docker images command:

With docker history {image-id} I can see the entire history of the image, each layer it is made of and the command which is responsible for the layer:
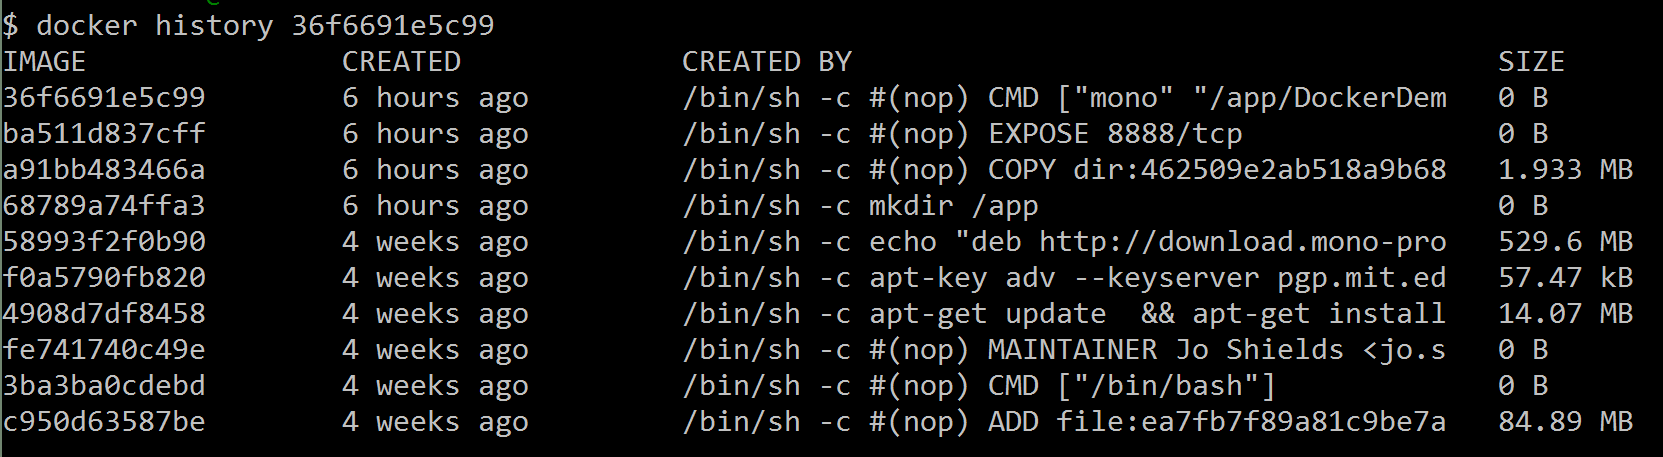
This is quite clever! Anyway, I am getting carried away here, the point is we just created our first Docker image!
If you want to upload the image into a repository on Docker Hub or another private registry you can use docker tag to tag an existing image with a new tag and docker push to upload it to the registry.
Create and run a Docker container
Running a Docker container couldn't be easier. Use the docker run command to create and run a container in one go:
docker run -d -p 8888:8888 docker-demo-nancy:0.1.0
The -d option tells Docker to run the container in detached mode and the -p 8888:8888 option maps the container's port 8888 to the host's port 8888.
Afterwards you can run docker ps to list all currently running containers:

Great, now pasting {docker-ip}:8888 (the IP address from the beginning) into a browser should return the Nancy hello world message:
And going to {docker-ip}:8888/os should return "Unix 4.1.13.2":
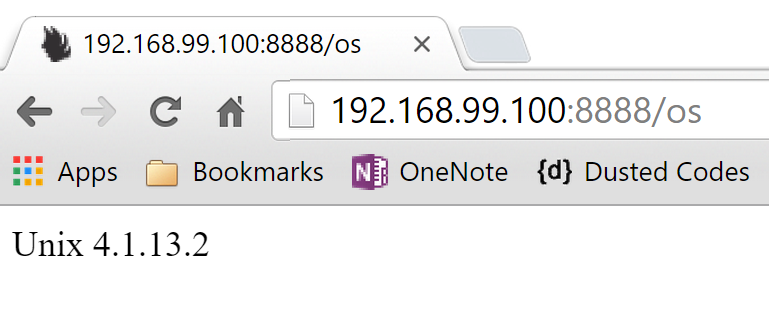
This is pretty awesome. With almost no effort we managed to run a Nancy .NET application on Mono in a Docker container!
Tip: map the Docker IP address to a friendly DNS
You can map the Docker IP address to a friendly DNS by editing your Windows hosts file:
- Open
C:\Windows\System32\drivers\etc\hostsas an administrator - Add a new mapping to a memorable DNS, e.g:
192.168.99.100 docker.local - Save the file
Now you can type docker.local:8888 into your browser and get the same result:
Configure environment specific settings with Docker
The last thing I would like to show in this blog post is how to manage environment specific variables with a Docker container.
I think it is pretty obvious that you must never change a Docker image when you promote your Docker container from one environment to another. This means that the app.config which has been packed into the image must be the same for every environment. Even though this is not a new practice I still see a lot of people transforming config files between environments. This has to stop and Docker makes it easy to load environment variables when launching a container.
Let's make a small change to the Nancy IndexModule:
public IndexModule()
{
    var secret = Environment.GetEnvironmentVariable("Secret");

    Get["/"] = _ => "Nancy: Hello World";
    Get["/os"] = _ => Environment.OSVersion.ToString();
    Get["/secret"] = _ => secret ?? "not set";
}
It is a fairly straight forward change. I load an environment setting with the name "Secret" into a local variable and expose it later.
This environment setting could be anything, but typically it includes sensitive data like encryption keys, database connection strings or other environment specific settings such as error log paths.
Needles to say that exposing the secret to the public is only for the purpose of this demo to show that it works.
Now I need to compile the application and build a new Docker image again, following the same instructions as before. I tagged the new image with docker-demo-nancy:0.2.0.
Before I launch a new container I want to stop the current one to avoid a clash on port 8888, otherwise I would happily run them side by side.
After I ran docker stop {container-id} I launch a new container with:
docker run -d -p 8888:8888 -e Secret=S3cReT docker-demo-nancy:0.2.0The docker run command takes in one or many -e options to specify environment settings. There are a few more options on specifiying environment settings, but the only one which you would ever want to use in a live environment is the --env-file option to load all environment variables from an external file.
This has many advantages:
- You can easily ship environment settings to environments
- You can easily provide many environment settings
- Sensitive data will not show up in logs
- The path to the file can be static which makes it easier to configure a scheduler to run containers in production
After launching the container with the secret setting I can run docker inspect {container-id} to load a whole bunch of information on the container. One piece of information is the environment variables which have been loaded for that container:

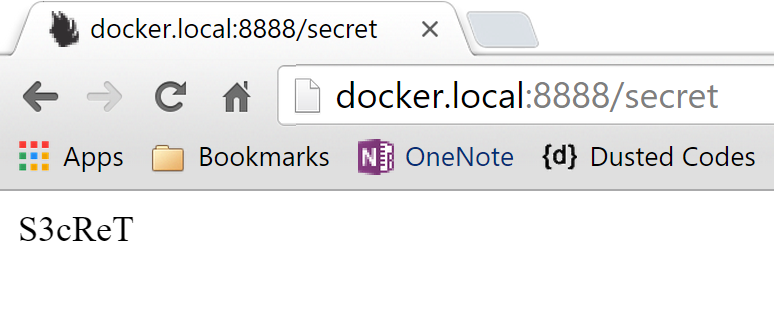
Going to docker.local:8888/secret will expose the secret environment variable now:
Recap
This brings me to the end of my first blog post on running .NET applications in Docker. I hope I could shed more light on some of the Docker basics and demonstrate how quick and easy you can build .NET applications for Docker.
For this demo I chose the NancyFx framework to build a web application, but I could have equally written a regular .NET application which can run on Mono or used ASP.NET 5 which does not only run on Mono but also on the new CoreCLR which is cross platform compatible.
Obviously there is a lot more that comes into running .NET apps in Docker which I haven't covered in this blog post. Some of these things are debugging applications in a Docker container, building Docker images from your CI and managing containers in production. Watch out for further blog posts where I will drill down into some of those topics!
The full source code of the demo application can be found on GitHub. I have also uploaded the Docker images to my public repository on Docker Hub.