Automating CSS and JavaScript minification in ASP.NET MVC 5 with PowerShell
Published
When I started building this blog I kept things very simple in the beginning. First there was nothing but my Hello World blog post and only later when I had more content I added more features over time. It didn't take me very long before I had to think about minifying static content such as CSS and JavaScript files to speed up page load times for my readers.
Minifying a CSS file is one of the most trivial tasks in web development and yet it is often more cumbersome than it has to be. It is too easy to forget updating a minified file when making some quick changes to the original file, or I'd update the minified file, but forget to swap the file paths in the HTML source code, leaving the live website pointing to the uncompressed version. These are typical mistakes which happen with manual tasks and every developer experiences at least once in their career. The best way to prevent these type of mistakes is to automate the entire process and reduce the human error.
The default project template in a Classic ASP.NET MVC web application offers runtime minification via the WebGrease NuGet library. It is not great but does the job for the lazy programmer. Runtime minification is not ideal because it puts additional load on the web server instead of doing the compression on the build server at an earlier stage. ASP.NET Core takes a different approach and promotes the use of post-build commands by utilizing Node modules to minify static assets. This is a much more elegant solution and works just as good.
The same an be achieved in a Classic ASP.NET application where it is perfectly feasible to use Node.js from a post-build event as well. Node is great when you care about cross platform compatibility, but it might be a slight overkill when the application only builds on a Windows machine and Node is not used anywhere else in the project. If an entire team works on Windows then you might as well use a technology which is already available to everyone. PowerShell would be one of those.
Tip: As an alternative to Node.js you can utilize CAKE or FAKE for cross platform compatible build events or entire build scripts. Both are open source and you get to use C# or F# through the entire project.
For my own website I am using PowerShell for the exact reason that I only work from a Windows machine and the website builds on a Windows server via AppVeyor.
In this blog post I will show how to use PowerShell to minify static assets from a post-build event in a Classic ASP.NET MVC 5 application and how to switch between compressed and uncompressed versions in Release and Debug mode.
Minifying CSS and JavaScript with PowerShell
Let's begin with the PowerShell script. In the first step I want to recursively find all CSS files within a given folder and exclude already minified files:
Get-ChildItem $SolutionDir -Recurse -Include *.css -Exclude *.min.css$SolutionDir is a variable pointing to the root path of the solution. This variable will be assigned when calling the script from a post-build event. I will come back to this later again.
The next step is to iterate through all CSS files and minify them. This can be achieved by piping | the result from Get-ChildItem to a foreach loop % and call a function on each individual element:
Get-ChildItem $SolutionDir -Recurse -Include *.css -Exclude *.min.css | % {
    Compress-CssFile -CssFilePath $_
}
The $_ symbol represents each individual element in a foreach loop, which then gets assigned to the -CssFilePath parameter of the Compress-CssFile function.
Next I have to implement the Compress-CssFile function:
Function Compress-CssFile
{
    [CmdletBinding()]
    param
    (
        [string] $CssFilePath
    )

    # ToDo: Implement
}
This is the basic skeleton of the function. The param section declares all parameters which can be passed into the function and the [CmdletBinding()] attribute defines that global flags such as -Verbose or -Debug will be inherited from the calling context.
The actual implemetation can vary in many ways, but for this blog post I thought it would be a good exercise to use the public API of the CSSMinifier web service.
The API is very simple. All I have to do is to send a HTTP POST request to http://cssminifier.com/raw/ with the original CSS content in the body and subsequently receive the minified version from the body of the response.
The Compress-CssFile function only accepts the full file path of a CSS file and therefore I need to read all of its content first:
$cssFile = Get-Item -Path $CssFilePath
$content = [System.IO.File]::ReadAllText($cssFile.FullName)
Now with the content I can initialize a HTTP body object and invoke a HTTP POST request to the API:
$body = @{input = $content}
$response = Invoke-WebRequest -Uri "http://cssminifier.com/raw/" -Method Post -Body $body
Before processing any further I can validate if the request was successful:
if ($response.StatusCode -ne 200)
{
    throw "Pick your own error message"
}
If the request was successful I can grab the minified CSS content from the response and save it under the same location as the original file, but with the .min.css file extension instead:
$compressedContent = $response.Content
$newFilePath = $CssFilePath.Replace(".css", ".min.css")
Set-Content -Path $newFilePath -Value $compressedContent -Force
Note how I used the -Force flag on the Set-Content cmdlet to overwrite an existing file with the same name. This is required to update the minified file even if it already exists.
Finally I put all of the above PowerShell code into one file and add the $SolutionDir parameter at the top. I name the PowerShell file MinifyCss.ps1 and save it in the root folder of my ASP.NET solution:
[CmdletBinding()]
param
(
    [Parameter(Position = 0, Mandatory = $true)]
    [string] $SolutionDir
)

Function Compress-CssFile
{
    [CmdletBinding()]
    param
    (
        [string] $CssFilePath
    )

    $cssFile = Get-Item -Path $CssFilePath
    $content = [System.IO.File]::ReadAllText($cssFile.FullName)
    $body = @{input = $content}
    $response = Invoke-WebRequest -Uri "http://cssminifier.com/raw/" -Method Post -Body $body

    if ($response.StatusCode -ne 200)
    {
        throw "Pick your own error message"
    }

    $compressedContent = $response.Content
    $newFilePath = $CssFilePath.Replace(".css", ".min.css")

    Set-Content -Path $newFilePath -Value $compressedContent -Force
}

Get-ChildItem $SolutionDir -Recurse -Include *.css -Exclude *.min.css | % {
    Compress-CssFile -CssFilePath $_
}
This script is ready now. Implementing the same functionality for JavaScript files is trivial. Simply copy the MinifyCss.ps1 file and rename it to MinifyJavaScript.ps1. Change the implementation to point to the public JavaScript Minifier API and change the file extensions from .css to .js.
Calling PowerShell scripts from an ASP.NET post-build event
The next step is to call both PowerShell scripts from an ASP.NET post-build event.
This couldn't be any easier. Right click the project file of your ASP.NET project and select "Properties" from the menu or select the project file and hit Alt + Enter on your keyboard.
Go to the "Build Events" dialog and paste the following code into the post-build event command line:
if $(ConfigurationName) == Debug (
    echo "Skipping CSS minification in debug mode."
    echo "Skipping JavaScript minification in debug mode."
) else (
    %windir%\System32\WindowsPowerShell\v1.0\powershell.exe -NoLogo -NonInteractive -Command "$(SolutionDir)MinifyCss.ps1" $(SolutionDir)
    %windir%\System32\WindowsPowerShell\v1.0\powershell.exe -NoLogo -NonInteractive -Command "$(SolutionDir)MinifyJavaScript.ps1" $(SolutionDir)
)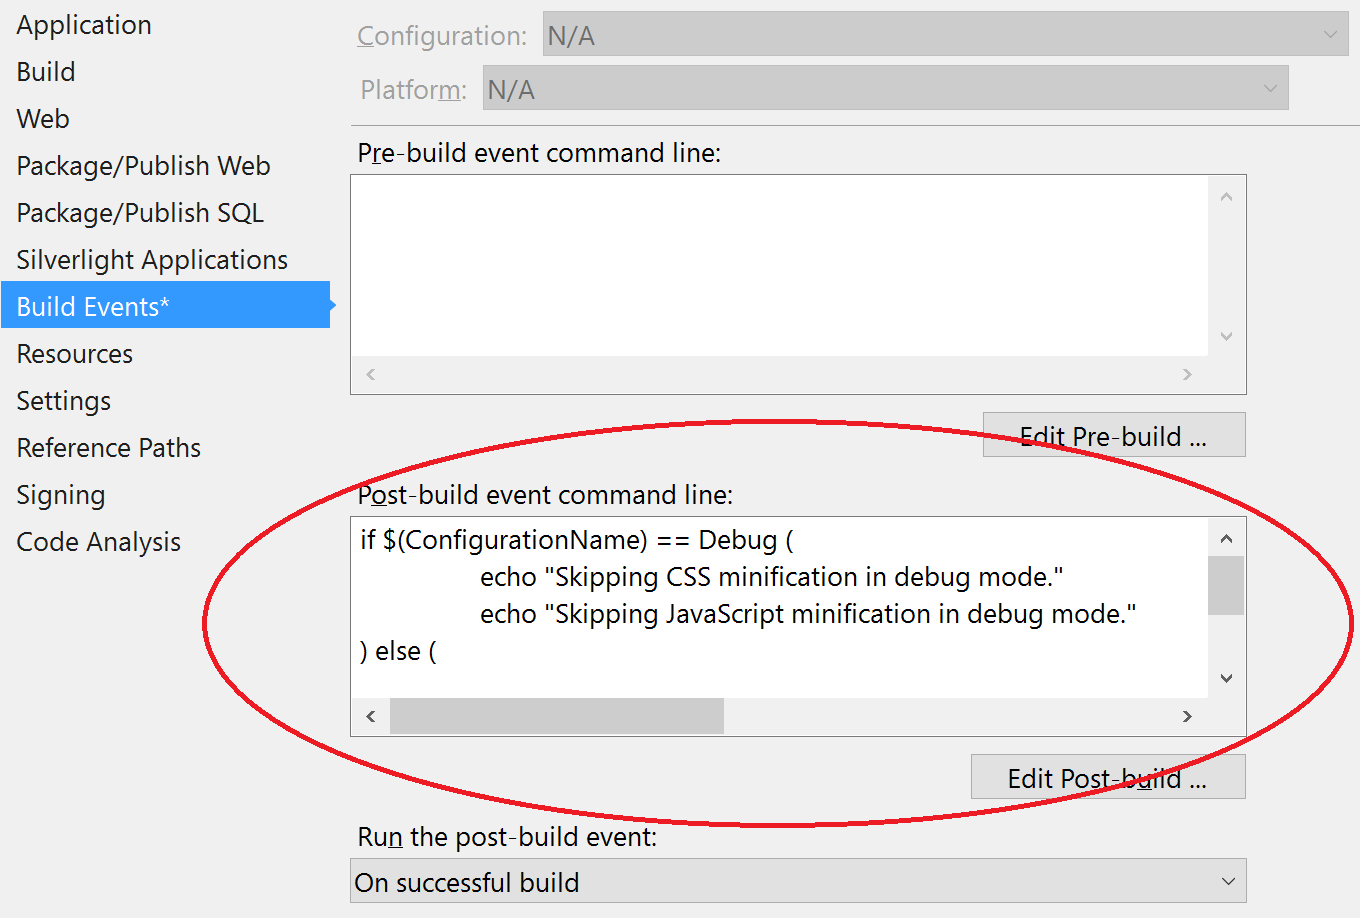
This code block makes sure that we only execute the PowerShell scripts when the project doesn't build in Debug mode. This is desired because during development we might make frequent changes to the original CSS file and not want to minify the content until we are ready to build in Release mode.
The $(SolutionDir) placeholder is a reserved MSBuild macro which points to the root directory of the solution. It gets passed directly to the PowerShell script where it gets assigned to the equally named PowerShell variable. The rest happens in PowerShell.
Swap between original and minified files in ASP.NET MVC Razor views
The last piece in the puzzle is to swap between the original and the minified files in the ASP.NET MVC Razor views. In Debug mode we want to point to the original file, so that we can test CSS changes without any friction during development, but in all other cases we want to swap it for the minified version instead.
In order to distinguish between Debug and Release mode in an MVC razor view we need a little helper class:
public static class BuildProperties
{
    public static bool IsDebugMode()
    {
#if DEBUG
        return true;
#else
        return false;
#endif
    }
}
With this helper method we can easily switch between the .css and .min.css files in the HTML markup:
@if (BuildProperties.IsDebugMode())
{
    <link type="text/css" href="~/Assets/Css/site.css">
}
else
{
    <link type="text/css" href="~/Assets/Css/site.min.css">
}
If you use C# 6.0 in your razor views then you can write it even neater with this one liner where you don't have to repeat the file path twice:
<link type="text/css" href=@($"~/Assets/Css/site{(BuildProperties.IsDebugMode() ? "" : ".min")}.css")>Voila, now you never have to worry about manually minifying static assets anymore. It just happens automatically during the Release build and the live website will reference the correct path to the minified file.